Flash Builder 4 – Deep Look Into Improvements!
by 26 June, 2009 12:10 pm5
Adobe released early June 2009 the Flash Builder 4 and we took the chance to look deep into this awesome program.
The news are many…. starting in IDE improvements to native Action Script handling, many other things were added. In this article we will show you some examples distributed in topics about some of these new features.
- Creating a new project
- Namespaces
- Themes and Skins
- Action Script and MXML news
- Services and code Wizards
- Remote data connection; PHP example
- Interaction with data
- AS3 Documentation
- Unit Tests
- Flash Catalyst Interaction
- Final Notes
Before starting to stretch me in the introduction we will take a look in the IDE that at first glance seems almost equal to the previous Flex builder, but in reality is only equal to Flex Builder 3 when it opens. At first sight it just stands out a new panel on the bottom where you can see two new tabs; a Data / Services and Network Monitor that are new in this version, and believe that they become very useful while developing your application.
Lets see then the IDE: (click to see bigger).

In the main screen, like Flex Builder, you can find some links that are very useful specially for those who are to start in Flash Builder / Flex. You will find also a link to the Tour de Flex that was updated with some elements of the Flex 4 framework, if you are completely newbie in Flex, i recommend those links. Moreover, all the rest remains equal with the exception of the eclipse logo on the right side of the screen, which seems to give relief to the excellent and versatile eclipse platform.
Creating a new project
The process is the same, but when clicking on the menu File you can already see some novelties like the Import Flex Project (Fxp) and Export Flex Project (Fxp) from where the developer can import another exported Flash Builder project but also projects and layouts made in Flash Catalyst. Let’s continue by creating a new project; menu File-> New-> and surprise! More news. You can now see a Test Case and Test Suite Class menus entries, which are presented as dialogues to create Unit Tests Classes, something that is completely new in this version.

Then select Flex Project, from which the opened panel options are almost equal in this new version with the exception that the current Flex SDK is the 4.0 Version. (you may also use a previous version to develop your project but many of the new Flash Builder will not be available.) Give a name to your project, for example, FlashBuilderTest, and click OK! More news… this time in the organization of the project. On the Package Explorer we now can see the application in a default package and obviously we can imagine a new folder structure for all the application files. We can see also a Flex 4 “folder” where you will find all parts of the Flex 4 framework as RSL’s (Runtime Shared Libraries), where we can explore their packages and see all the classes names and source codes.
This new structure helps us to better understand the relationships between components, their layout and organization. You can easily understand that all the elements that compose the Flex 4 framework (like the new textLayout library, the new spark skins (sparkskins.swc), the data visualization which includes graphics displayed in the flex, the Remote Procedure Call (RPC) library and many more… you will have time to explore these components and classes.
At the bottom, next to the panel who spoke earlier, Data / Services, you will find a new tab, ASDoc that allows us to visualize the documentation for our classes that is available alng with the class. Very useful for team projects in which we must share information about our classes. interfaces and received/returned values.

Namespaces
When switching to the MXML code, we can already find the new namespaces that where created with the new Flex 4 framework. Let’s take a look:
![]()
![]()
![]()
Here starts the real news of Flex 4 and Flash Builder, the new namespaces:
- fx – The new Flex 4 namespace, which implements the old mx namespace; the first and only loaded by default in Flex 3 applications.
- s – Spark, One of the most big news, brings on many visual components targeted exclusively to the Flash Player 10, a new architecture of components that allows us to further extend and customize even more (almost to the limit) the native components and extended ones.
- mx – Our previous namespace, for this one nothing more to talk… usual flex 3 components.
These new namespaces bring many new components that will need some time to learn and be discovered.
Moving on to the FB visual. The components are now in a new disposition, in the components explorer you will find now the components distributed in to several “folders”. Find a button and drag it on the stage, you can see in the code that it is loaded directly from the namespace spark.
<s:Button ..>
If you copy the button code and change the prefix from s: to mx: the button copied is displayed exactly as the s:button, but its properties change a little, the new Spark Button has more possibilities of customization, specially in the Styles section. Switch between them to discover the new options and improvements.
Themes and Skins
This new version came with a different application and components layout, the new default theme Spark. In this new version of flash builder is easier than ever to change all application theme / skin in just a simple click. We can now fully customize the application without writing a single line of code thanks to the theme switcher that is built in the application. To access it, in the visual area click on the stage then on the right Appearance panel you will find the current default theme: spark. If click on it, a new window will open where you can choose a new theme from the default theme library or download more themes using the find more themes bottom button that will further enhance the list of themes when they begin to be created by the community. Look at the themes window (click to view larger)

Action Script & MXML news
Many! Not in the Action Script itself but in the way the Flash Builder deals with the Action Script and MXML code, but especially in the way Flash Builder interacts with action script.
But let’s start with the MXML, write a simple “<” and you will see more new features… The package explorer opens together with the class documentation, this documentation becomes available immediately in the editor, and can even click on the “Tab” key to get the focus and freely browse the various components and its namespaces.
Any visual element, for example a button, has also its documentation, whether in the main class (Button) but it also in the properties, just put the mouse over one of the properties like the width and you will see also the documentation for that property. You can now understand that will be much easier to obtain information of a unknown class or the properties a certain element, without leaving the Application and without even know the code behind the class. Will be very useful for Custom Community Action Script Classes. Check the look and feel of this popup element.

The Action Script related news begin even in MXML code. If we want to write a piece of AS code into our application we would start the AS area of the mxml with the <mx: script>… but this was in flex 3, the mx:script has been replaced by the <fx:script..> because is the default namespace. You cannot do nothing about it! Just learn it. This changes definitively as well some few older Flash Builder MXML elements of the mx namespace, that is no longer available in as the default namespace, same like <f:Style> and some other small things.

But lets go to see an example in Action Script, write import, and as you can see you will now find some differences in the packages available, among them the new authoring, fl, flashxspark, if you expand them you will find hundreds of news. and
Write only:
import mx.controls.Alert;
Once you begin to write the Alert, you are immediately prompted with the class documentation, which ends up in a very easy interpretation of the class and it’s properties.
If you move the mouse over the Alert, you can see the class documentation without ever leaving the IDE, click F2 if you want to see the rest of the class documentation and of the related classes. This information is available in almost all components, which is one of the best aid to the programmer, especially with so many new features this is without doubt the best bet in this new Flash Builder Version. All the class information can also be seen in the ASDoc panel, simply place the mouse over the class who you want to see the documentation.
In the documentation you will also find related classes, the version of flex, flash player and Air runtime.
Code and Services Wizard
In the MXML when dealing with events, it is also possible to automatically generate the code to handle that kind of event, called Generate Event Listener where only a click generates the handling function.
In the IDE, there are also new cool features, mainly to accelerate the planning and development process of an application, see the example of a button when right-clicking on him in stage you will see some new options like the Generate Service Call and Generate Click Handler.
The Click Handler Generator allows to quickly generate a very the function to deal with a click of the mouse on it. This is made automatically and the developer is immediately transferred to the code view.
The Generate Service Call can easily generate the code necessary to call a remote service via HTTP, Web service or Remoting call via LCDS, BlazeDS or PHP (via ZendFramework), if there is no data source, the flex builder starts a wizard responsible to ask some informations to create a new service data source. Here you can find a much improved feature from the old Flex Builder, the creation of data services and now we can say that communication with LCDS, PHP or Java is easier than ever, for about 5 minutes and a few clicks our Remoting Service is ready to work. In my application I use php, follow the example, click the Generate Service Call and answer yes to create a new data service. Then you can see a panel like this:

Data Service connection; PHP Example.
In this wizard, as you can see, there are some different wizards, to see how PHP communication is simple, choose PHP, then you are prompted to configure a php server, something that is very simple, click Yes and enter the paths relative to your server, in my case I chose PHP server, in the Web Root put the system path location for the folder htdocs / www taking for example a Standard WAMP installation: c:\wamp\www\myProject and put in the Root URL the path of your browser to that folder, usually: http://localhost/myProject and then click ->Validate Configuration.
The output folder will be automatically generated, if not, write down something like:
c:\wamp\www\myProject\myProject-debug.
Then click OK, the previous wizard backs on screen again to allow you the creation of data requests ad write down some more information, such as the name of the service. For example write down PHPTEST and then you can select your php class where you have the functions of php (can be a amfphp or zendAMF class) or a standard class CRUD Class, click Generate Sample PHP Class, to use the Sample Class and click Finish. Just before the data source is available to use, we need an AMF implementation for communication with PHP and Flash Builder. Now flash builder gives you the latest new AMF implementation from Adobe, a self-installation of the latest Zend Framework version will be available to installation that is required to install if you want these wizards to make Flash Builder communicate with PHP.

Click OK and wait a little bit. The framework will be installed in a few moments (although all the entire framework is not necessary the Flash Builder will install all the framework components, the advantages are many when we use the whole framework because it is one of the best php frameworks in the market).
When it finish you will be informed that the framework was installed in the same folder as the application and that his location should be changed, for security reasons, when distributing a final application, this change must be informed in the. amf_config.ini file.
After zendAMF installed, click OK again. Probably you will find an error “Unable to open the Zend Loader”, that is because the installation seems to make a mistake in the Zend framework paths. To solve this issue you must open the folder c:\wamp\www\myProject\myProject-debugamf_config.ini, edit it and change the third line:
;zend_path = c:\Frameworks\ZendFramework\library
With the zend framework correct path (installed under ZendFramework) (don’t forget to remove the “;” char!):
zend_path = c:\wamp\www\myProject\ZendFramework\library
Save the file and return back to Flash Builder, click OK in the error window and click Finish again. The error disappeared right? in some cases if an error occurs to access, verify the permissions of your web server. After this it opens the PHP class with a newly created CRUD and some more operations to test, write on the second function (getAllItems) only: return “Hello World”; and save your file.
If you return to Flash Builder, you are asked if you want to add a return type of the function and if you want to associate that function to a visual component like a dataList or AdvancedDataGrid, just click OK for now. Now the panel Date / Services becomes the magic Remote Operation browser.

Before you can use one of these functions, you need to indicate what kind of data returns from each function, for that click on the function getAllItems and right-click and choose Configure Return Type, indicate the type of data that your function return., for For automatic detection, make a custom data type by writing a name and indicating some possible parameters of the function (received parameters) for auto detection and then click Next. In our case we will use Action script data type: String.
As you can see main picture above, the getAllItems is with a green icon indicates that our service is ready to be used, this only happens after we tell the data type that the function returns.
Data interaction
After all this process to work with php, the rest of the data handling is the most easy. Another of the big news is that is not only possible (as mentioned before) to associate a call from a service by a button-click right mouse, but also by drag & drop the function into one component; Drag the getAllItems function to your button and the necessary code will be automatically created to call the service and handling data.
Generally the result handler for the data received from the backend is not generated, but if you drag the service into a DataGrid it will be also generated, this once again provides a useful window to accelerate the process, the wizard is to assign data to a list, “Bind to Data” :

In this wizard you can choose the service and the operation, in our case we define the return type of getAllItems as String but that can’t be attributed to a DataGrid as dataProvider because it receives a Ilist / ArrayCollection, so for testing put this in your php function:
$data[0]->name="Hello";
$data[0]->age="26";
$data[0]->country="France";
$data[1]->name="World";
$data[1]->age="55";
$data[1]->country="Italy";
return $data;
Save the php file and go back to flash builder, in the Bind To Data dialog, click the Change return type: Choose custom data type: and write Client, click next and then next again, and voilà, the data returned from php:

As you can see the wizard identifies the data previously received from php, and can even add some possible missing data of the function return.
Click Finish and wait, the icon of function getAllItems in the Data / Services changes to various “triangular icons”… then click on OK in the wizard.
Finally we have the data in the DataGrid, and each data item is mapped directly by a VO which have been auto generated (Client.as, derived from _SUPER_CLIENT.as) that can be modified to implement or extend, leaving out the main mapper class (_SUPER_CLIENT.as). You can find all these classes in the Explorer window under the package services.phptest.
By doing this, the datagrid is automatically changed to handle and present our data without a single line of code, simply run the application. All the dirty work has been made by the wizard…

The remaining operations of CRUD can easily be made using these wizards, and we can even give our argument as VO, very useful for creation or modification of an element in a database.
This is without doubt one of the strongest points of the new Flex Builder, which almost makes automated all the work to interact with data sources.
In this new version of Flex 4 and MXML for remote communication was almost eliminated the absolute need to use different methods with a RemoteObject. With these wizards is so much easier since all the code is generated and transformed in Action Script Classes and Components.
In our case all the service call and data assignment is done in just these lines:
<fx:Declarations>
  <s:CallResponder id="getAllItemsResult"/>
  <phptest:PHPTEST id="pHPTEST" destination="PHPTEST"
  endpoint="http://localhost/test/myProject/myProject-debug/gateway.php"
  fault="Alert.show(event.fault.faultString)" showBusyCursor="true"
  source="PHPTEST"/>
</fx:Declarations>
Something much simpler and more reusable than in previous versions of Flex Builder. Although it is quite easy, that deserve a few hours around all the generated code because it can be very useful but can also extend the size of our application unnecessarily, so always check the generated classes and objects, analyze your situation and delete which is not necessary.
AS3 Documentation
As was said before is now possible to see the documentation of a class without having to access it, simply follow this example, create a new Action Script Class based on a Sprite in com.msdevstudio package, and then if you want to document the class, just do it within the package, before the class identification, within the block / ** ** /, as the following example shows:
package com.msdevstudio
{
	/**
	 * Welcome to my TestClass by Mário Santos
	 *
	 * To use just write: import com.msdevstudio.testClass and then
	 * var temp:TestClass = new TestClass()
	 *
	 *
	 * @see flash.display.Sprite
 	 *
 	 *  @langversion 3.0
 	 *  @playerversion Flash 9
 	 *  @playerversion AIR 1.1
 	 *  @productversion Flex 3
	 *
	 * */
	import flash.display.Sprite;
	public class TestClass extends Sprite
	{
		/**
		 * Create a new instance of the class!
		 */
		public function TestClass()
		{
			//TODO: implement function
			super();
		}
	}
}
Save your class, import it in the application and pass the mouse over it: import com.msdevstudio.TestClass; then you will obtain the help/documentation dialogue as the following picture shows.

As you can see is easier than ever to create, distribute and document your classes. Grab this habit, the open source community will appreciate!
Unit Tests
In this new version is now also possible to create classes or tests to make unit tests to the application and understand the app performance and reliability, all this without having to use any external libraries or frameworks. This is also one of the most exciting news for anyone who wants the most from their application and avoid errors in high-usage cases.
Flash Catalyst interaction
This connection is made almost instantly, just import any Flash Catalyst project using the Import Flex Project (fxp) having in mind that once you open your project in Flash Flash Builder the Flash Catalyst will no longer be able to open it. This is perhaps one of the poor aspects of this interaction.
Moreover, although with some details to be improved, the import of the Flash Catalyst layout in to Flash Builder occurs without any problem. Soon we will have here a tutorial teaching how to import, process and code a layout of Illustrator and publish it to Flash via the Flash Builder and Flash Builder Catalyst.
Final Notes
The new Flash builder makes things much simpler and, without doubt, it will accelerate much the development of rich internet applications, especially when you work with data. The new wizards guide us on the difficult process of communicating with a backend in a few simple steps, things that seems difficult are now very easy. The creation of inline documentation for each class will help the more novices but certainty will also help the most experienced developers to know a little better the classes and make the most of them.
The new namespaces still coexist with the old mx, so developers still have some time to absorb everything that is new in version 4 of this framework, especially the almost complete guidance to states in component level that can help developers for one hand but for the other may complicate the code.
Finally, the most big news are in the new Flex 4 framework, which should be studied with some attention because it brings many hundreds of new features.
So, that’s, hope you have liked, leave a comment and spread the world!
Related posts

Latest / by - ago
What Are Smartwatches & How Do They Work?
Explore the world of smartwatches and find the ideal device to suit your lifestyle, with our curated selection of top-rated smartwatches that cater to every budget and preference.
Reviews / by - 19 March, 2024 9:25 am
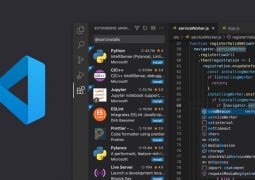
In-depth Review of Visual Studio Code: Features & Performance
Get an in-depth review of Visual Studio Code, the free, open-source code editor with robust features and integrations.

Announcements & News / by - 15 February, 2016 4:36 am
ICANN to Allow .What-everrrr Domain Registrations
The Internet Corporation for Assigned Names and Numbers (ICANN) has changed a rule that will allow the reservation of existing domain names that use any combination of letters and numbers….

Latest / by - 4 February, 2016 1:04 pm
Some of the more popular alternatives to point of sale checkout
Decades ago we were all used to queueing at the traditional point of sales (POS). The high street cash register was king when it came to paying for purchases, in…

iPhone / by - 19 January, 2016 2:47 pm
How much protection do you get from an iPhone screen protector?
Many people argue that it’s no longer necessary to protect your iPhone with a screen protector due to the higher quality of glass used in construction. If you have seen…

Tech News / by - 4 December, 2015 4:30 am
Why Would I Need a GoPro?
While modern smartphone cameras have moved far beyond their basic beginnings to become comparable alternatives to dedicated camera equipment for amateur photographers, the GoPro’s range of advanced features make it…

Tech News / by - 11 September, 2015 6:20 am
Here’s Why You Should Buy a Tablet This Year
The iPad was introduced in the spring of 2010. That was the beginning of the modern tablet era. In fact, 2011 was the year of the iPad/tablet. From that point,…

Tech News / by - 18 June, 2015 11:06 am
Smart Decisions to Secure Your Apple Device
Millions of customers use iPhones, Macbooks and other Apple devices. The growing use of Apple products has led to hundreds of security threats to these devices. Malware and viruses can…

Tech News / by - 5 March, 2015 4:42 am
How Economic Networks Are Replacing Economies of Scale in The Knowledge Economy
In the book, Information Rules, authors Carl Shapiro and Hal R. Varian make an astonishing statement: “There is a central difference between the old and new economies: the old industrial…

Tech News / by - 9 December, 2014 6:59 am
Samsung Galaxy Products: A Cut Above The Rest
Samsung is the market leader in terms of smartphone sales. Samsung galaxy products are ahead of its class and are known for its innovative features and affordable price. The company’s…
Tech News / by - 20 November, 2014 8:29 am
Japan’s Domestic Companies Loss is International Online Casino Industries Gain
Japan remains one of the largest, if not the largest, untapped gambling markets in the world, in regards to both the online and offline sectors for domestic companies. This dominating…

Tech News / by - 7 November, 2014 5:57 am
Five Reasons to Use Your Smartphone as a Credit Card Reader
Years ago, the term “credit card reader” was not used very loosely. Either you had a machine that allowed you to take an imprint of a customer’s credit card or…

Tech News / by - 9 July, 2014 9:35 am
More Creative Ways to Sell Your Products Online
Selling goods on the Internet is both easy and difficult. It’s easy because there are many available resources that make setting up online shops quick and easy. They can also…
Tech News / by - 9 July, 2014 9:25 am
Getting the Right Video Conferencing Equipment for an Effective Team Collaboration
Any time you need to get on a video conference call, you might worry about whether the person on the other end can see and hear you properly. If you’re…

Tech News / by - 23 May, 2014 6:09 am
Fighting Internet Lag – 4 Strong Tips For Reducing Connection Latency
Internet drag, or “latency” is a dreaded occurrence to all equally. It sucks to have to wait for buffering, or to have your immersive video gaming experience so rudely interrupted…

Tech News / by - 5 August, 2013 7:28 am
When Tech Goes Wrong – The Biggest Tech Outages of 2013
Most of the time, we expect search engines, social networks and other forms of web technology to be up and running – but recent events have shown that even big…

Tech News / by - 20 July, 2013 2:26 pm
New Apps You Must Know About
Combining Apps with IFTTT iPhone’s new automation app ‘If This Then That’(IFTTT) allows you to bring two separate apps together by mentioning which of them is the “This” one and…

Tech News / by - 18 July, 2013 2:58 pm
Five Tablet Apps To Dispel Your Doodle Dilemmas
For all those who lament over the neglect that technology has showered on the art of doodling till date – good news has arrived. In a space cluttered with inefficient…

Tech News / by - 16 July, 2013 1:35 pm
Is your Android Device Safe?
The Android OS is Google’s open source operating platform for smart phone and tablet devices. Android is currently the second most popular platform in terms of number of users. This…
Tech News / by - 13 July, 2013 3:07 pm
Apple’s App Store – Now and Then
The world of personal computing went for a spin on 10th July 2008 with the launch of Apple’s App Store, presenting its users with an unfathomable ocean of apps that…


