Create Cool Line Effects using Actionscript 3.0 in Flash CS4 or Flex Builder 3
by 18 May, 2009 12:30 pm23
In this tutorial, you will learn the basics of architecting a simple Line Effect, like the one you can see bellow, either using Flash CS4 or Flex Builder 3.
We cover the basics on the simplest way, so everyone will be able to step in the scripted animation with actionscript 3.0 and create a nice visual effects like glow and blur.
Requirements
One of the following:

Pre-Requisites
It would be useful to know how to use classes.
Create a ActionScript 3.0 Project or Class
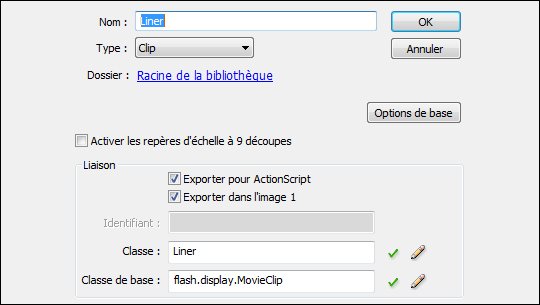
If you use Flex Builder just create a new ActionScript 3.0 Project and call it LineEffect. If you use Flash CS3 or CS4 create a Flash File(ActionScript 3.0), and call it LineEffect.as . The Flash File and the class must be in the same folder. Well, this was the first step. See… It was not so hard. After that we can go and write our code
package {
	import flash.display.Sprite;
Same Imports
Again, if you use Flex Builder (Flex Builder I use too), it is not mandatory to write this step, because Flex Builder automatically imports when it sees something unknown. But if you use Flash CS3 or CS4 is required to write this step.
	import flash.display.Graphics;
	import flash.display.MovieClip;
	import flash.display.Sprite;
	import flash.events.Event;
	import flash.events.MouseEvent;
	import flash.filters.BlurFilter;
	import flash.filters.DropShadowFilter;
	import flash.filters.GlowFilter;
	import flash.text.TextField;
	import flash.utils.getTimer;

       [SWF(width = "600", height = "400", frameRate = "30", backgroundColor = "#000000",    	pageTitle  = "Line Effect")]
If you are confused about this line of code:
[SWF(width = "600", height = "400", frameRate = "30", backgroundColor = "#000000", pageTitle = "Line Effect")]
Well, here we set the width, height, framerate, backgroundColor and the title of the SWF file.
Declaring Variables
To be easier for your future reference, I’ve declared variables for each color line. But before colors we need to declare a Sprite because we want to draw a line, and apply an effect to it. After that we will declare an Array that will help to animate the line. At the end we will declare the buttons with text as also line colors. The line colors consists in a BlurFilter, two GlowFilter and a DropShadowFilter. The code looks like that:
	public class LineEffect extends Sprite
	{
		private var sp:Sprite = new Sprite();
		private var points:Array = new Array();
		private var prevmouseX:Number = 0;
		private var prevmouseY:Number = 0;

		private var fireBtn:MovieClip = new MovieClip();
		private var fireTF:TextField = new TextField();

		private var skyBtn:MovieClip = new MovieClip();
		private var skyTF:TextField = new TextField();

		private var grassBtn:MovieClip = new MovieClip();
		private var grassTF:TextField = new TextField();

		private var sunBtn:MovieClip = new MovieClip();
		private var sunTF:TextField = new TextField();

		private var bf:BlurFilter = new BlurFilter(3,3,1);
		private var growFilter:GlowFilter = new GlowFilter(0xff3300, 2, 20, 10, 2, 3, true, false);
		private var growFilter_b:GlowFilter = new GlowFilter(0xfff000, 2, 16, 10, 3, 9, false, false);
		private var dropShadow:DropShadowFilter = new DropShadowFilter(0, 360, 0xC11B17, 1, 70, 70, 5, 3, false, false, false);

		private var growFilter_2:GlowFilter = new GlowFilter(0x00ffff, 2, 20, 10, 2, 3, true, false);
		private var growFilter_b_2:GlowFilter = new GlowFilter(0x00ffff, 2, 16, 10, 3, 9, false, false);
		private var dropShadow_2:DropShadowFilter = new DropShadowFilter(0, 360, 0x000fff, 1, 70, 70, 5, 3, false, false, false);

		private var growFilter_3:GlowFilter = new GlowFilter(0x4AA02C, 2, 20, 10, 2, 3, true, false);
		private var growFilter_b_3:GlowFilter = new GlowFilter(0x4AA02C, 2, 16, 10, 3, 9, false, false);
		private var dropShadow_3:DropShadowFilter = new DropShadowFilter(0, 360, 0x4AA02C, 1, 70, 70, 5, 3, false, false, false);

		private var growFilter_4:GlowFilter = new GlowFilter(0xFDD017, 2, 20, 10, 2, 3, true, false);
		private var growFilter_b_4:GlowFilter = new GlowFilter(0xFDD017, 2, 16, 10, 3, 9, false, false);
		private var dropShadow_4:DropShadowFilter = new DropShadowFilter(0, 360, 0xFDD017, 1, 70, 70, 5, 3, false, false, false);
What events we have here?
First we add the sp(Sprite) to the stage, then we add an Enter_Frame event to our Sprite, draw each button and create a Click event for each one in order to change from color and effect.
		public function LineEffect()
		{

			this.addChild(sp);
			this.addEventListener(Event.ENTER_FRAME, onEnter);

			drawFireBtn(fireBtn);
			drawSkyBtn(skyBtn);
			drawGrassBtn(grassBtn);
			drawSunBtn(sunBtn);

			fireBtn.addEventListener(MouseEvent.CLICK, makeFire);
			skyBtn.addEventListener(MouseEvent.CLICK, makeSky);
			grassBtn.addEventListener(MouseEvent.CLICK,makeGrass);
			sunBtn.addEventListener(MouseEvent.CLICK, makeSun);

			sp.filters = [bf, dropShadow];
		}
        }
}
Enter Frame Function
The following Enter Frame function will track the mouse coordinates and show the effect on the stage .
		private function onEnter(e:Event):void
		{
			var line:Graphics = sp.graphics;
			line.clear();
			line.lineStyle(2, 0xffffff);
			line.moveTo(mouseX, mouseY);

            var dx:Number = this.mouseX - prevmouseX;
			var vx:Number = dx ? dx : Math.random() * randSet(-1, 1);
			var dy:Number = this.mouseY - prevmouseY;
			var vy:Number = dy ? dy : Math.random() * randSet(-1, 1);
			var pLen:Number = points.push({x:this.mouseX, y:this.mouseY, vx:vx / 20, vy:vy / 20, life:getTimer()});

			for (var i:Number = 0; i < pLen; i++)
			{
				if (!points[i])
				{
					continue
				}
				if (getTimer() - points[i].life > 1000)
				{
					points.splice(i--, 1)
				}
				else
				{
					if (i!=0 && points[i])
					{
						points[i].x += points[i].vx;
						points[i].y += points[i].vy;
						var cx:Number = points[i - 1].x;
						var cy:Number = points[i - 1].y;
						line.curveTo(cx, cy, (points[i].x + cx) * 0.5, (points[i].y + cy) * 0.5 );
					}
					else
					{
						line.moveTo(points[i].x, points[i].y);
					}
				}
			}

			prevmouseX = this.mouseX;
			prevmouseY = this.mouseY;
                }
                private function randSet(p_min:Number,p_max:Number):Number
		{
			return Math.floor(Math.random() * 2);
		}
        }
}
Draw the buttons and make the click events
Now we write a function for each button that applies the colors and effects we have created in the beginning. On each function we insert the text buttons into the stage by drawing it with actionscript 3.0 using the drawRect class and we choose the rectangle fill color. Then we create a second function inside this one which calls the MouseEvent we have mentioned above and will start the effect.
private function drawFireBtn(obj:MovieClip):void
		{
			with(obj.graphics)
			{
				beginFill(0x0000ff,0);
			    drawRect(0,0,20,20);
			    endFill();
			}
			fireTF.text = "Fire"
			fireTF.textColor = 0x666666;
			fireTF.mouseEnabled = false;
			fireTF.selectable = false;

			this.addChild(obj);
			obj.buttonMode = true;
			obj.addChild(fireTF);
			obj.x = 20;

			obj.y = 380;
		}

		private function makeFire(E:MouseEvent):void
		{
			sp.filters = [bf,growFilter,growFilter_b,dropShadow];

		}

		private function drawSkyBtn(obj:MovieClip):void
		{
			with(obj.graphics)
			{
				beginFill(0x0000ff,0);
			    drawRect(0,0,20,20);
			    endFill();
			}
			skyTF.text = "Sky"
			skyTF.textColor = 0x666666;
			skyTF.mouseEnabled = false;
			skyTF.selectable = false;

			this.addChild(obj);
			obj.buttonMode = true;
			obj.addChild(skyTF);
			obj.x = 70;
			obj.y = 380;
		}

		private function makeSky(e:MouseEvent):void
		{
			sp.filters = [bf,growFilter_2,growFilter_b_2,dropShadow_2];
		}

		private function drawGrassBtn(obj:MovieClip):void
		{
			with(obj.graphics)
			{
				beginFill(0x0000ff,0);
			    drawRect(0,0,25,20);
			    endFill();
			}
			grassTF.text = "Grass"
			grassTF.textColor = 0x666666;
			grassTF.mouseEnabled = false;
			grassTF.selectable = false;

			this.addChild(obj);
			obj.buttonMode = true;
			obj.addChild(grassTF);
			obj.x = 120;
			obj.y = 380;
		}

		private function makeGrass(e:MouseEvent):void
		{
			sp.filters = [bf,growFilter_3,growFilter_b_3,dropShadow_3];
		}

		private function drawSunBtn(obj:MovieClip):void
		{
			with(obj.graphics)
			{
				beginFill(0x0000ff,0);
			    drawRect(0,0,20,20);
			    endFill();
			}
			sunTF.text = "Sun"
			sunTF.textColor = 0x666666;
			sunTF.mouseEnabled = false;
			sunTF.selectable = false;

			this.addChild(obj);
			obj.buttonMode = true;
			obj.addChild(sunTF);
			obj.x = 170;
			obj.y = 380;
		}

		private function makeSun(e:MouseEvent):void
		{
			sp.filters = [bf,growFilter_4,growFilter_b_4,dropShadow_4];
		}
	}
}
This was the Line Effect tutorial. I hope it will be usefull for many of you. Now you can try to create your own line effects and drop a comment mentioning the url of your experiments. We are always looking for the results of our tutorials.
Related posts

Effects / by - 14 January, 2012 5:55 pm
Learn Digital Painting in Photoshop
It’s impossible for everyone to become an artist, but many of them have a will to become an artist, to draw beautiful paintings but again due to lack of command…

Effects / by - 28 December, 2011 2:28 pm
How to Make a New Year Greeting Card in Photoshop
This is so much easy to go in a market and by paying some bucks; purchasing a New Year Greeting Card or any other festival card for your loving person…

Flash / by - 10 August, 2011 4:13 pm
Creating a Gallery in Flash Using the Moto CMS Component
In this tutorial we will create a gallery with the help of the Moto CMS Component. I think many of you have heard about (or even worked with) Moto Flash…

3D / by - 24 July, 2011 5:21 pm
Visualize Your Web Page in 3D
Ever wondered if you could visualize your website in 3D? Well, here’s one such Firefox extension that allows you to do so. Tilt is a Firefox add-on that lets you visualize any web page DOM and provides the relationship between various parts of a website in 3D.

Interfaces / by - 1 March, 2011 2:18 pm
Beginners Guide To User Interface Design in C#
User Interface Design in C# Windows Form Application From Scratch In this C Sharp tutorial you will learn user interface design in C# application. This step-by-step tutorial will help you deeply understand…
Effects / by - 1 December, 2010 2:34 pm
Create an intelligent XML image Gallery & Slideshow in Flash CS4 (+PHP) – Part II/II
In this second part article you will learn how to build an image gallery that will load images from a web server. I decide to call it “Intelligent” because you don’t need to configure any XML or flash file. Just put the Flash movie and the images on a server and they will be loaded automatically. Nice ah?
Flex / by - 29 May, 2010 2:56 pm
Connecting Flex Calendar With Database Using AMF-PHP
Connecting Flex Calendar with Database using AMF-PHP Part I: Create a Dynamic Event Calendar in Flex Builder 3 with Actionscript 3.0 This is Part II of Create a Dynamic Event…
Server Side / by - 13 April, 2010 2:39 pm
CodeIgniter Tutorial – CodeIgniter Explained
Hello everyone, and welcome to the first CodeIgniter tutorial. What will you learn? 1. What is a PHP Framework? 2. What is CodeIgniter? 3. What is MVC? 4. MVC Pattern…

3D / by - 20 March, 2010 10:00 am
Away3D Shoot’em’Up Tutorial – Powerups
In this article we add some powerups to the game.

3D / by - 15 February, 2010 3:59 pm
Away3D Shoot’em’Up Tutorial – Sound Effects
In this article we add some sound effects to the game.
3D / by - 28 July, 2009 1:00 pm
Create from Scratch a Away3D Shoot’em’Up Game: Part 4
Now that we have the player and some enemies we need for them to be able to interact. This is done through collision detection which you will learn in this fourth part.

Effects / by - 21 July, 2009 1:00 pm
Getting Started With BetweenAS3
There are many popular open source tweening engines in the Flash community today. Numbered among these are Tweener, TweenLite/Tweenmax, Tweensy, and GTween. This is a short look at the capabilities of newcomer to the scene: BetweenAS3. BetweenAS3 is the tweening engine brainchild of Yoshihiro (yossy) Shindo and is available as part of the Spark project (i.e. it is brought to us by one of the same group that brought the world the FLARToolkit for Augmented Reality in Flash and countless other goodies).
3D / by - 15 July, 2009 12:50 pm
Create from Scratch a Away3D Shoot’em’Up Game: Part 3
After you have created the 3D level, in the part 3 of this Away3D series, we will show you how to add the player spacecraft and enemies.
Effects / by - 13 July, 2009 12:30 pm
Create an intelligent XML image Gallery & Slideshow in Flash CS4 (+PHP) – Part I/II
In this article you will learn how to build an image gallery that will load images from a web server. I decide to call it “Intelligent” because you don’t need to configure any XML or flash file. Just put the Flash movie and the images on a server and they will be loaded automatically. Nice ah?
3D / by - 8 July, 2009 1:45 pm
Create from Scratch a Away3D Shoot’em’Up Game: Part 2
In the part 1 of these tutorial series articles we created a framework that we could build off to start making the actual game. Now it’s time to create a 3D level for the player to fly through.
3D / by - 6 July, 2009 12:50 pm
Create from Scratch a Away3D Shoot’em’Up Game: Part 1
Today we start a 9 part tutorial series on creating a Shoot’em’Up game. We will cover all the necessary topics to create it from scratch, which will help you to understand and apply these guidelines to other projects. Ath this first part. we look at getting the Away3D engine up and running by creating a UIComponent that will contain and initialize the necessary Away3D components.
Effects / by - 1 July, 2009 1:00 pm
Build a Creative “Swirl Animated Menu” with Flash CS4
Flash it’s a powerful application and can be really complex, but even beginners can create a cool menu for demonstration or for use in a personal site. The menu that we will create is simple, but the swirl animation is something that you don’t see everywhere, for that I’ve decided to explain one way to make an animation of growing swirls without any Action Script code.You will also learn how to import artwork from illustrator where I’ve pre-made the graphics, the work is very simple and the result will be very cool.
Flash / by - 29 June, 2009 12:00 pm
SWFObject and Best Practice Implementation
With more and more full screen Flash web sites appearing on the internet, it’s important to understand how to properly embed the Flash movie in the browser window.
In this tutorial we will cover best practice embedding of SWF movies using SWFObject with a custom function for adding browser scrollbars for smaller browser windows.
3D / by - 24 June, 2009 12:30 pm
Create a 3D Bowling Game with JiglibFlash and Papervision 3D
Possibly the hottest thing to hit the Flash community since the advent of several excellent 3D engines is the recent debut of 3D physics engines. Here we’ll examine a way of using one of the more popular 3D engines, JiglibFlash, in conjunction with the prominent 3D engine Papervision3D to create a bowling game.
Flex / by - 22 June, 2009 1:00 pm
Create a Dynamic Event Calendar in Flex Builder 3 with Actionscript 3.0
This tutorial will allow readers to create an Event Calendar application using Flex. The final user will be able to plan over a daily, weekly or monthly plan.
You will learn on this step by step Flex tutorial, to create from scratch those Graphic User Interfaces, integrate them, and create a complete Rich Internet Application with a professional look.


