How to Install Google Chromium OS: A Hands-On Overview
by 6 January, 2011 10:59 am145

Now that Google has officially released Google Chromium OS to the public it’s time to get down and dirty and try it out. Of course there will be bugs and software issues, but that’s part of being one of the pioneers. Every bug found by a user and reported to the system developers, is another chance to OS perfection.
For the purpose of this tutorial on how to download Google Chrome OS (and how to install it), we are going to use the “Flow” Chromium OS build from Hexxeh, which can be downloaded here.
Download Google Chrome OS
Click here to download it now!
Thanks to Hexxeh, who tweaked the Google Chrome OS source code, the OS can be easily installed from a 2 or 4GB flash drive in a matter of minutes. Users simply need to create a bootable flash drive with the Google Chrome OS image on their current operating system. Instructions are going to be listed for users running a version of Windows, however on the Flow homepage there are more complete instructions for Mac and Linux distro users.
After you download Google Chrome OS, back up any important files on the related flash drive. The drive will be formatted and all files will be wiped clean (you have been warned).
First we begin by downloading all important files for the operation.
Step 1: Navigate to the Vanilla Chromium Build homepage and scroll all the way to the top of the version listing (latest build version).
Step 2: Click on the “Download USB Image (picture of a USB drive)” and the zipped OS image file should begin downloading. The file is 200MB+ and should take a while so go relax and come back in about 15-20 minutes.
Step 3: Once the Chromium OS image has completed downloading, we will also need to download the Windows Image Writer so that we can successfully create a bootable image on our flash drive. The Image Writer page can be found here, with the download link on the right hand side of the page (first green tab). This download won’t take long (less than 1 minute on high speed internet) so you might as well just wait until it’s done.
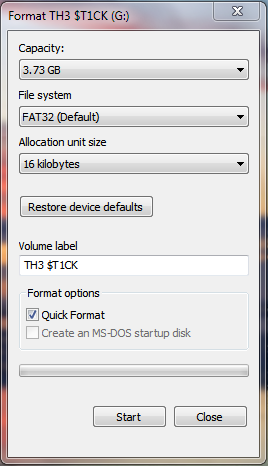 Step 4: Once everything has finished downloading we must format our flash drive. Simply insert the drive into a USB slot in your computer and wait for Windows to mount the drive. Then navigate to “Computer”, right click on the flash drive in the device list and select “format…”. The format menu will open, just click the “Start” button and Windows will automatically format your flash drive.
Step 5: Unzip the Image Writer file and open the Win32DiskImager program (Windows Vista, 7 and x64 bit users will need to right click and select the “Run as administrator” option). An error may, or may not, pop up when the program is starting. It’s referring to a floppy drive that is not installed on your machine, dismiss the error by selecting “Ok”.
Step 6: Unzip the Chrome OS .tar.gz image file you downloaded by using WinRAR or 7Zip and make sure the extracted files are in an easily navigable directory.
Step 7: In the Image Writer menu select the correct drive letter of your inserted flash drive. This can be checked easily by opening “Computer” or “My Computer”. Once the correct drive is selected, you must then select the blue folder icon and navigate to the Google Chrome OS image file in the browser window that pops up. If you have successfully selected the correct image it will show up in the address bar to the left of the open source icon.
Step 8: Double check the drive letter of your flash drive and then select “Write” after making sure. A warning will pop up indicating your drive may malfunction if you happen to select the wrong one, dismiss the warning message and the program should begin writing a bootable image to your flash drive.
Step 9: When the program has finished writing the image and displays “Done” in the bottom left corner you may then remove the flash drive and close the program.
 Step 10: Reboot the machine and choose the USB thumb drive you just created as the boot partition. The computer will then boot into the Google Chrome OS Flow build.
Step 11: The first time you login into the OS you will need to login using a common login name and password. The Login screen looks like the image at the top left, with the Google Chrome and Flow logos clearly evident.
Login: facepunch
Pass: facepunch
After the OS has started up simply login to a Gmail or email account. After you have successfully logged in, reboot the computer (press power off) and complete the steps again to boot into the Google Chrome OS. You should then be able to login to the OS using your Gmail account and password once it boots up. Netbook users are less fortunate, there is currently a bug preventing login – so just login using the “facepunch” info. All personal account information will be stored however so you won’t have to keep logging in after reboots.
Congratulations, now you know where to download Google Chrome OS and how to install it!
After you have completed installation and played around with the new Google Chrome OS let us know your thoughts, we have created a forum topic just for that purpose. Let us know of other Chrome OS builds out there, or any questions you may have pertaining to this one. The forum post is here.
Related posts

Announcements & News / by - 15 February, 2016 4:36 am
ICANN to Allow .What-everrrr Domain Registrations
The Internet Corporation for Assigned Names and Numbers (ICANN) has changed a rule that will allow the reservation of existing domain names that use any combination of letters and numbers….

Latest / by - 4 February, 2016 1:04 pm
Some of the more popular alternatives to point of sale checkout
Decades ago we were all used to queueing at the traditional point of sales (POS). The high street cash register was king when it came to paying for purchases, in…
iPhone / by - 19 January, 2016 2:47 pm
How much protection do you get from an iPhone screen protector?
Many people argue that it’s no longer necessary to protect your iPhone with a screen protector due to the higher quality of glass used in construction. If you have seen…
Tech News / by - 4 December, 2015 4:30 am
Why Would I Need a GoPro?
While modern smartphone cameras have moved far beyond their basic beginnings to become comparable alternatives to dedicated camera equipment for amateur photographers, the GoPro’s range of advanced features make it…
Tech News / by - 11 September, 2015 6:20 am
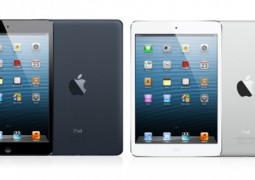
Here’s Why You Should Buy a Tablet This Year
The iPad was introduced in the spring of 2010. That was the beginning of the modern tablet era. In fact, 2011 was the year of the iPad/tablet. From that point,…

Tech News / by - 18 June, 2015 11:06 am
Smart Decisions to Secure Your Apple Device
Millions of customers use iPhones, Macbooks and other Apple devices. The growing use of Apple products has led to hundreds of security threats to these devices. Malware and viruses can…

Tech News / by - 5 March, 2015 4:42 am
How Economic Networks Are Replacing Economies of Scale in The Knowledge Economy
In the book, Information Rules, authors Carl Shapiro and Hal R. Varian make an astonishing statement: “There is a central difference between the old and new economies: the old industrial…
Tech News / by - 9 December, 2014 6:59 am
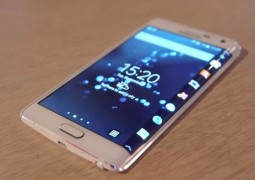
Samsung Galaxy Products: A Cut Above The Rest
Samsung is the market leader in terms of smartphone sales. Samsung galaxy products are ahead of its class and are known for its innovative features and affordable price. The company’s…
Tech News / by - 20 November, 2014 8:29 am
Japan’s Domestic Companies Loss is International Online Casino Industries Gain
Japan remains one of the largest, if not the largest, untapped gambling markets in the world, in regards to both the online and offline sectors for domestic companies. This dominating…
Tech News / by - 7 November, 2014 5:57 am
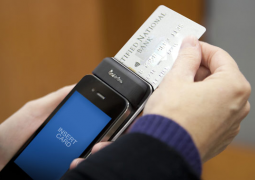
Five Reasons to Use Your Smartphone as a Credit Card Reader
Years ago, the term “credit card reader” was not used very loosely. Either you had a machine that allowed you to take an imprint of a customer’s credit card or…

Tech News / by - 9 July, 2014 9:35 am
More Creative Ways to Sell Your Products Online
Selling goods on the Internet is both easy and difficult. It’s easy because there are many available resources that make setting up online shops quick and easy. They can also…
Tech News / by - 9 July, 2014 9:25 am
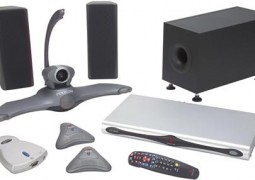
Getting the Right Video Conferencing Equipment for an Effective Team Collaboration
Any time you need to get on a video conference call, you might worry about whether the person on the other end can see and hear you properly. If you’re…

Tech News / by - 23 May, 2014 6:09 am
Fighting Internet Lag – 4 Strong Tips For Reducing Connection Latency
Internet drag, or “latency” is a dreaded occurrence to all equally. It sucks to have to wait for buffering, or to have your immersive video gaming experience so rudely interrupted…

Tech News / by - 5 August, 2013 7:28 am
When Tech Goes Wrong – The Biggest Tech Outages of 2013
Most of the time, we expect search engines, social networks and other forms of web technology to be up and running – but recent events have shown that even big…

Tech News / by - 20 July, 2013 2:26 pm
New Apps You Must Know About
Combining Apps with IFTTT iPhone’s new automation app ‘If This Then That’(IFTTT) allows you to bring two separate apps together by mentioning which of them is the “This” one and…

Tech News / by - 18 July, 2013 2:58 pm
Five Tablet Apps To Dispel Your Doodle Dilemmas
For all those who lament over the neglect that technology has showered on the art of doodling till date – good news has arrived. In a space cluttered with inefficient…

Tech News / by - 16 July, 2013 1:35 pm
Is your Android Device Safe?
The Android OS is Google’s open source operating platform for smart phone and tablet devices. Android is currently the second most popular platform in terms of number of users. This…
Tech News / by - 13 July, 2013 3:07 pm
Apple’s App Store – Now and Then
The world of personal computing went for a spin on 10th July 2008 with the launch of Apple’s App Store, presenting its users with an unfathomable ocean of apps that…

Tech News / by - 10 July, 2013 3:24 pm
Dodge The Disaster: A Five-Step Guide To Technology-Based Disaster Preparation
Disasters are unpredictable and unpreventable. Being prepared to face the inevitable, whenever it strikes, is definitely judicious. In the modern-day world of incredible breakthroughs in every field, technology has progressed…
Tech News / by - 7 July, 2013 12:04 pm
Google’s Offline Disk Import: Just the Thing Developers Wished For
If you are worried about importing very large sets of data on Google Cloud Storage, then Google has come up with just the right solution. Google has recently added a…


