Simulating PicLens with Flex and Away3D – Part 1
by 17 September, 2008 12:02 am15
This tutorial article is a Step by step guide for creating a PicLens type 3D photo viewer with Flex and Away3d. This is step 1, of a 3 part tutorial that will sweep many useful techniques used in web application design, Flex, and Flash 3D design.
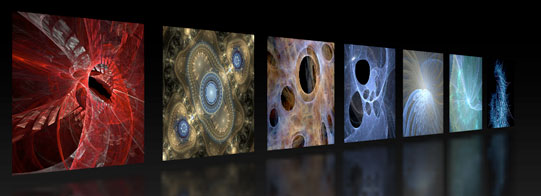
In the final the result will be this.
Requirements
- Adobe Flash CS3
- Adobe Flex Builder 3
- Away3d Library (I recommend using the version I used)
- Tweener Library
- Source Files
Pre Requisites
- Intermediate programming skills
- Moderate knowledge of AS3
- Basic Familiarity with OOP
- Basic knowledge of Flash CS3
Step 0
In this tutorial I will assume that you are familiar with the basics of building an Actionscript Away3D project in Flex. If you haven’t used these two technologies together before, it would be best if you go through my previous tutorial first. Due to the complexity of this application, I will need to skip some things to go faster. So, if something is not explained here, or suddenly a large chunk of code is dropped with no descriptions, it has been covered (hopefully) in the mentioned tutorial.
Step 1 – New Project
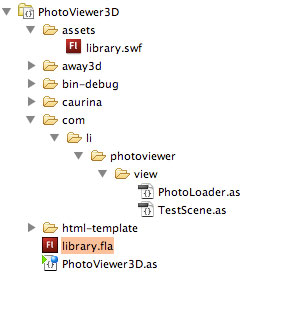
Lets get started. Create a new Actionscript Project in Flex and name it “PhotoViewer3D”. Then, download the libraries I listed in the requirements and paste them in the project’s folder.
Now, one of the things that will be covered here is a very simplified application architecture that could be a good starting point for any project you do that implies a moderate level of complexity. For this, all code will be placed in a folder structure, carefully separating functions between different classes, and hence emulating the basics of a Model View Controller design pattern. You should have a general grasp of it by the end of this series.
Right click on the project’s folder in the Flex Navigator and choose New -> Folder, then type “com/li/photoviewer/view” and press Finish. Naming folders this way is known as Reverse Domain Syntax, and is a good programming practice.
Step 2 – Setting up the scene
Go to PhotoViewer3D.as and build a basic main class:
package
{
     import flash.display.Sprite;
     import flash.display.StageAlign;
     import flash.display.StageScaleMode;

     import com.li.photoviewer.view.TestScene;

[SWF(backgroundColor="0x000000", frameRate="30")]

     public class PhotoViewer3D extends Sprite
     {
          public function PhotoViewer3D()
          {
               stage.scaleMode  = StageScaleMode.NO_SCALE;
               stage.align  = StageAlign.TOP_LEFT;

               var testScene:TestScene = new TestScene();
               addChild(testScene);
          }
     }
}
Line 7 imports an away3D holding class that we haven’t made yet, so we should create it right away. Right click on the “view” folder and choose New -> Actionscript Class and name it “TestScene”. It should have the following code in it:
package com.li.photoviewer.view

{

     import away3d.cameras.Camera3D;
     import away3d.containers.Scene3D;
     import away3d.containers.View3D;
     import away3d.core.clip.RectangleClipping;
     import away3d.core.math.Number3D;

     import flash.display.Sprite;
     import flash.events.Event;

     public class TestScene extends Sprite
     {
          private var scene:Scene3D;
          private var camera:Camera3D;
          private var view:View3D;

          public function TestScene()
          {
               addEventListener(Event.ADDED_TO_STAGE,  init, false, 0, true);
          }

          public function init(evt:Event):void
          {
               removeEventListener(Event.ADDED_TO_STAGE,  init);

               initScene();
               initObjects();
               addEventListener(Event.ENTER_FRAME,  renderScene);
          }

          private function initScene():void
          {
               scene  = new Scene3D();

               camera  = new Camera3D();
               camera.zoom  = 10;
               camera.focus  = 200;
               camera.z  = -2000;

               view  = new View3D();
               view.camera  = camera;
               view.scene  = scene;
               view.x  = stage.stageWidth/2;
               view.y  = stage.stageHeight/2;
               view.clip  = new RectangleClipping(-stage.stageWidth/2,  -stage.stageHeight/2, stage.stageWidth/2, stage.stageHeight/2);
               addChild(view);
          }

          private function initObjects():void
          {

          }

          private function renderScene(evt:Event):void
          {
               camera.x  = 3*(mouseX - stage.stageWidth/2);
               camera.y  = 3*(mouseY - stage.stageHeight/2);
               camera.lookAt(new Number3D(0, 0, 0));

               view.render();
          }
     }
}
NOTE: If any of this shocked you, it has all been explained in the tutorial mentioned in Step 0.
Step 3 – Setting up our PhotoLoader component
Create a new Actionscript Class in the view folder and name it “PhotoLoader”. These will be our 3D photograph object. The class will extend Away3D’s Plane primitive, with a few additional features, more particularly, the ability to load an external image. So, lets start by setting up the plane:
package com.li.photoviewer.view
{
import away3d.primitives.Plane;

public class PhotoLoader extends Plane
     {
private var urlPath:String;

          public function PhotoLoader(urlPath:String)
          {

               super();

               this.urlPath = urlPath;

               this.rotationX = 90;
               this.width = 640;
               this.height = 480;
               this.segmentsH = 4;
               this.segmentsW = 4;
          }
     }
}
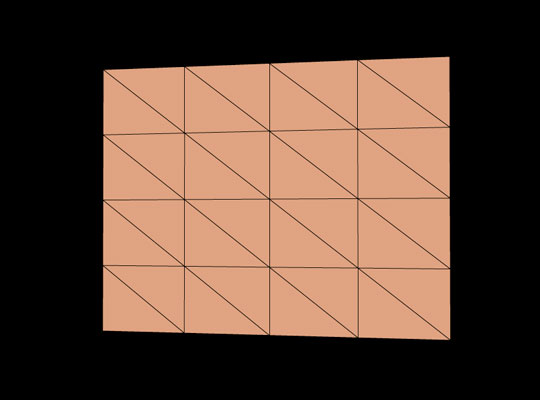
As you can see, we’ve set up the constructor so that when we instantiate a PhotoLoader object, we pass it the image name it has to load as a parameter. Now, go back to TestScene, and in the “iniObjects()” method, make an instance of PhotoLoader and add it to the scene:
var testPhoto:PhotoLoader = new PhotoLoader("imgs/testImage.jpg");

scene.addChild(testPhoto);
The urlPath we passed this time will be irrelevant, but we’ll pass it anyway so no errors are thrown. Go ahead and test the application, you should see something like this:
Step 4 – Skinning the plane with Flash
First of all, we need to give the plane a skin or texture. Even though it will contain an image, it needs to contain something else while it’s loading, and somehow show progress for that load process. For this, we will design some graphics in Flash, and bring them to Flex with what I find to be a very practical and simple technique. We will use a fla file to generate a library.swf file that will contain some graphics for our application, and then embed that swf in Flex and extract the clips as we need them. This is a very useful technique, and I definitely recommend it for any Flex projects that contain design based vector graphics.
Open Flash, create a new AS3 Flash File and save it in your project’s folder, next to PhotoViewer3D.as. Once in it, select File -> Publish Settings and type “assets/library.swf” for the swf output path (deselect the html output). Now, create a new folder next to that fla called “assets” either from your file explorer or by right clicking the project’s folder in the Flex Navigator. Now, if you publish the fla you will see that library.swf shows up in your newly created assets folder.
Step 5 – Creating and extracting the graphics created in Flash
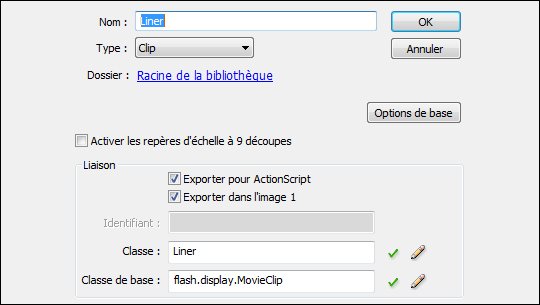
Great, now I wont be describing how to make the graphics in Flash since I believe you must be very familiar with this. You should download the fla and overwrite the one you just made. Sorry! Just wanted to make sure you understood what’s going on. Now, open the downloaded fla. You will see a clip called “LoaderFront” made up of a gray box and a progressBar clip which has in turn a sub clip. The important thing to notice here is that LoaderFront has a Linkage and its Base Class was changed to Sprite. Publish it again, go back to Flex, right click on library.swf in the assets folder and choose Refresh.
This is the only code you’ll need to pull those graphics from Flex, type it at the top of the PhotoLoader class (inside Public class…):
[Embed(source="assets/library.swf", symbol="LoaderFront")]
public var LoaderFront:Class;
You’ve just extracted the symbol from the swf’s library and assigned it to a LoaderFront class. If you create a new instance of this class (and add it to the display tree), you’ll have a graphics object that extends Sprite! And you can treat it as any other sprite. Great isn’t it?
Step 6 – Applying the graphics to the plane
Go back to PhotoLoader.as and create these variables for the class:
private var materialSprite:Sprite;
private var progressBar:Sprite;
private var progressBarSubClip:Sprite;
And then this method:
private function initClips():void
{
     materialSprite  = new LoaderFront();

     progressBar  = Sprite(materialSprite.getChildByName("progressBar"));
     progressBarSubClip  = Sprite(progressBar.getChildByName("subClip"));
}
Now we have references to all the clips that we need. You have to add the “initClips()” call at the end of the constructor class.
Next, type this new method under the last one and also make sure you call it from the constructor:
private function initMaterial():void
{
     var material:MovieMaterial = new MovieMaterial(materialSprite);
     material.smooth  = true;

     this.material = material;
}
And Test the application. You should now see that the plane has taken the graphics as its material. Your PhotoLoader class should look like this so far:
package com.li.photoviewer.view
{
     import away3d.materials.MovieMaterial;
     import away3d.primitives.Plane;
     import flash.display.Sprite;
     public class PhotoLoader extends Plane
     {
         [Embed(source="assets/library.swf", symbol="LoaderFront")]
          public var LoaderFront:Class;
          private var urlPath:String;
          private var materialSprite:Sprite;
          private var progressBar:Sprite;
          private var progressBarSubClip:Sprite;
          public function PhotoLoader(urlPath:String)
          {
               super();
               this.urlPath = urlPath;
               this.rotationX = 90;
               this.width = 640;
               this.height = 480;
               this.segmentsH = 4;
               this.segmentsW = 4;
               initClips();
               initMaterial();
          }
          private function initClips():void
          {
               materialSprite  = new LoaderFront();
               progressBar  = Sprite(materialSprite.getChildByName("progressBar"));
               progressBarSubClip  = Sprite(progressBar.getChildByName("subClip"));
          }
          private function initMaterial():void
          {
               var material:MovieMaterial = new MovieMaterial(materialSprite);
               material.smooth  = true;
               this.material = material;
          }
     }
}
Step 7 – Loading images into the plane
The final thing to do for Part 1 of this tutorial, is implement all the image loading features of our extended plane. For this, we will use a regular Loader instance and add a few event listeners to check for progress and complete events.
Add the loader variable next to the other class variables:
private var loader:Loader;
And call a new method under the “initMaterial()” call in the constructor as “initLoader()”, then build the method:
private function initLoader():void
{
     loader = new Loader();
     loader.contentLoaderInfo.addEventListener(ProgressEvent.PROGRESS,  progressHandler);
     loader.contentLoaderInfo.addEventListener(Event.INIT,  initHandler);
     materialSprite.addChild(loader);
     loader.alpha  = 0;
}
The loader is initialized, two listeners are registered, then the loader is injected to the plane’s material sprite completely invisible. I’ve made it invisible because I’m going to make it fade in once the image has been loaded into it.
Now, lets set up the handlers and a little “setProgress()” utilitary method:
private function progressHandler(evt:ProgressEvent):void
{
     setProgress(evt.bytesLoaded/evt.bytesTotal);
}
private function initHandler(evt:Event):void
{
     Tweener.addTween(loader,  {alpha:1, time:1, transition:"easeoutexpo"});
}

private function setProgress(value:Number):void
{
     progressBarSubClip.scaleX  = value;
}
Pretty straight forward. As the image downloads, the progress handler calls the “setProgress()” function which in turn sets the horizontal scale of the progress bar, and when the download completes, or more precisely when the loaded content is initialized, Tweener makes the loader fade in by animating its alpha. Don’t forget to import Tweener for this:
import caurina.transitions.Tweener;
Step 8 – Triggering the load
Next, lets trigger the load by adding a “loadImage()” method as the last method called in the constructor and defining it:
private function loadImage():void
{
     loader.unload();
     loader.alpha  = 0;
     setProgress(0);
     loader.load(new URLRequest(urlPath));
}
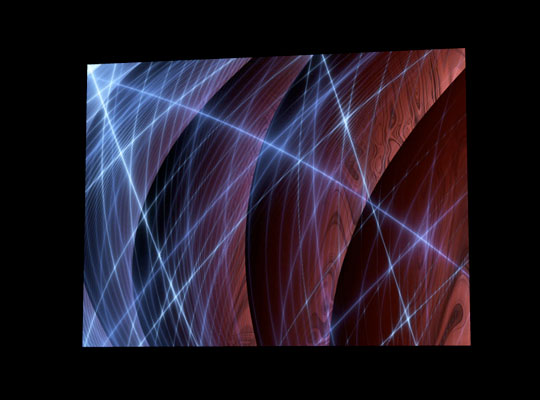
Finally, create the imgs folder in the project, download THESE images and paste them in it. Test the app, you should see the image loaded on the plane:
Watch the Demo HERE.
NOTE: If you have any security issues at this point you should disable the compilers network for now. Do this by right clicking the projects folder, choosing properties, then clicking on the Actionscript Compiler tab and in the Additional Compiler Settings, type “-use-network=false”. Don’t forget to disable this when you go online… This is something anyone using Flex gets to know one way or the other for quickly getting over any sandbox issues.Next:
On the next part we will continue to develop our application by using multiple instances of this PhotoLoader object, developing advanced camera motion and interactivity.
Related posts

Effects / by - 14 January, 2012 5:55 pm
Learn Digital Painting in Photoshop
It’s impossible for everyone to become an artist, but many of them have a will to become an artist, to draw beautiful paintings but again due to lack of command…

Effects / by - 28 December, 2011 2:28 pm
How to Make a New Year Greeting Card in Photoshop
This is so much easy to go in a market and by paying some bucks; purchasing a New Year Greeting Card or any other festival card for your loving person…

Flash / by - 10 August, 2011 4:13 pm
Creating a Gallery in Flash Using the Moto CMS Component
In this tutorial we will create a gallery with the help of the Moto CMS Component. I think many of you have heard about (or even worked with) Moto Flash…

3D / by - 24 July, 2011 5:21 pm
Visualize Your Web Page in 3D
Ever wondered if you could visualize your website in 3D? Well, here’s one such Firefox extension that allows you to do so. Tilt is a Firefox add-on that lets you visualize any web page DOM and provides the relationship between various parts of a website in 3D.

Interfaces / by - 1 March, 2011 2:18 pm
Beginners Guide To User Interface Design in C#
User Interface Design in C# Windows Form Application From Scratch In this C Sharp tutorial you will learn user interface design in C# application. This step-by-step tutorial will help you deeply understand…
Effects / by - 1 December, 2010 2:34 pm
Create an intelligent XML image Gallery & Slideshow in Flash CS4 (+PHP) – Part II/II
In this second part article you will learn how to build an image gallery that will load images from a web server. I decide to call it “Intelligent” because you don’t need to configure any XML or flash file. Just put the Flash movie and the images on a server and they will be loaded automatically. Nice ah?
Flex / by - 29 May, 2010 2:56 pm
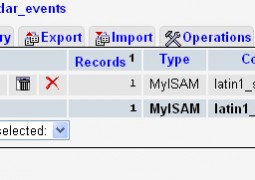
Connecting Flex Calendar With Database Using AMF-PHP
Connecting Flex Calendar with Database using AMF-PHP Part I: Create a Dynamic Event Calendar in Flex Builder 3 with Actionscript 3.0 This is Part II of Create a Dynamic Event…
Server Side / by - 13 April, 2010 2:39 pm
CodeIgniter Tutorial – CodeIgniter Explained
Hello everyone, and welcome to the first CodeIgniter tutorial. What will you learn? 1. What is a PHP Framework? 2. What is CodeIgniter? 3. What is MVC? 4. MVC Pattern…

3D / by - 20 March, 2010 10:00 am
Away3D Shoot’em’Up Tutorial – Powerups
In this article we add some powerups to the game.

3D / by - 15 February, 2010 3:59 pm
Away3D Shoot’em’Up Tutorial – Sound Effects
In this article we add some sound effects to the game.
3D / by - 28 July, 2009 1:00 pm
Create from Scratch a Away3D Shoot’em’Up Game: Part 4
Now that we have the player and some enemies we need for them to be able to interact. This is done through collision detection which you will learn in this fourth part.

Effects / by - 21 July, 2009 1:00 pm
Getting Started With BetweenAS3
There are many popular open source tweening engines in the Flash community today. Numbered among these are Tweener, TweenLite/Tweenmax, Tweensy, and GTween. This is a short look at the capabilities of newcomer to the scene: BetweenAS3. BetweenAS3 is the tweening engine brainchild of Yoshihiro (yossy) Shindo and is available as part of the Spark project (i.e. it is brought to us by one of the same group that brought the world the FLARToolkit for Augmented Reality in Flash and countless other goodies).
3D / by - 15 July, 2009 12:50 pm
Create from Scratch a Away3D Shoot’em’Up Game: Part 3
After you have created the 3D level, in the part 3 of this Away3D series, we will show you how to add the player spacecraft and enemies.
Effects / by - 13 July, 2009 12:30 pm
Create an intelligent XML image Gallery & Slideshow in Flash CS4 (+PHP) – Part I/II
In this article you will learn how to build an image gallery that will load images from a web server. I decide to call it “Intelligent” because you don’t need to configure any XML or flash file. Just put the Flash movie and the images on a server and they will be loaded automatically. Nice ah?
3D / by - 8 July, 2009 1:45 pm
Create from Scratch a Away3D Shoot’em’Up Game: Part 2
In the part 1 of these tutorial series articles we created a framework that we could build off to start making the actual game. Now it’s time to create a 3D level for the player to fly through.
3D / by - 6 July, 2009 12:50 pm
Create from Scratch a Away3D Shoot’em’Up Game: Part 1
Today we start a 9 part tutorial series on creating a Shoot’em’Up game. We will cover all the necessary topics to create it from scratch, which will help you to understand and apply these guidelines to other projects. Ath this first part. we look at getting the Away3D engine up and running by creating a UIComponent that will contain and initialize the necessary Away3D components.
Effects / by - 1 July, 2009 1:00 pm
Build a Creative “Swirl Animated Menu” with Flash CS4
Flash it’s a powerful application and can be really complex, but even beginners can create a cool menu for demonstration or for use in a personal site. The menu that we will create is simple, but the swirl animation is something that you don’t see everywhere, for that I’ve decided to explain one way to make an animation of growing swirls without any Action Script code.You will also learn how to import artwork from illustrator where I’ve pre-made the graphics, the work is very simple and the result will be very cool.
Flash / by - 29 June, 2009 12:00 pm
SWFObject and Best Practice Implementation
With more and more full screen Flash web sites appearing on the internet, it’s important to understand how to properly embed the Flash movie in the browser window.
In this tutorial we will cover best practice embedding of SWF movies using SWFObject with a custom function for adding browser scrollbars for smaller browser windows.
3D / by - 24 June, 2009 12:30 pm
Create a 3D Bowling Game with JiglibFlash and Papervision 3D
Possibly the hottest thing to hit the Flash community since the advent of several excellent 3D engines is the recent debut of 3D physics engines. Here we’ll examine a way of using one of the more popular 3D engines, JiglibFlash, in conjunction with the prominent 3D engine Papervision3D to create a bowling game.
Flex / by - 22 June, 2009 1:00 pm
Create a Dynamic Event Calendar in Flex Builder 3 with Actionscript 3.0
This tutorial will allow readers to create an Event Calendar application using Flex. The final user will be able to plan over a daily, weekly or monthly plan.
You will learn on this step by step Flex tutorial, to create from scratch those Graphic User Interfaces, integrate them, and create a complete Rich Internet Application with a professional look.


